Tutorial - Painted Arch Mural
Sometimes the simplest things can make the biggest impact. We just finished painting an Instagram wall for an adorable Airbnb in Nashville, TN and we love how it transformed the room! (Check it out here) A painted arch, or two, is an easy way to create a beautiful focal wall with little cost. It can also frame in wall decor, be a background for a piece of furniture, or simply be a statement piece in a room. Follow along with these easy steps to paint your own arch.
Before you pick up a brush, here a few things to do ahead of time:
· Pick your color. A painted arch can be any color from a soft and subtle blush to a bright and bold mustard yellow. Before buying paint in the store, we always recommend bringing paint swatches into the room where you want to paint to see how the light in the room affects the color. Paint swatches often look very different from how they look in the paint store once you get them home!
· Decide how tall and wide you want your arch/arches to be. For this example arch below, it is 36 inches wide and 78 inches tall from the baseboard.
· Gather supplies.
Supply list:
Want the easy button? Click the link to see exactly the type/brand we love and to order these supplies from Amazon. As an Amazon Associate we earn from qualifying purchases. When you buy through our links it helps support our families and brings you more great content. (And doesn’t cost any extra!)
Level (the longer, the better)
Pencil – we prefer a mechanical pencil for light lines
Roller Cover (we recommend a 6 inch roller cover)
Painter’s Tape (optional)
Paint Brush – we recommend the Purdy Clear Cut 2 inch angled.
Paint
Handy Cup (optional)
Step 1 - Draw Vertical Sides
Once you have decided how wide and tall you want your arch to be, it’s time to draw the vertical sides of your arch using a yard stick, level, and pencil. Draw your lines as light as possible! Make sure to use the level to ensure that your lines are a perfect vertical. You don’t want your arch to look like it is falling over!
Step 2 - Draw Arched Top
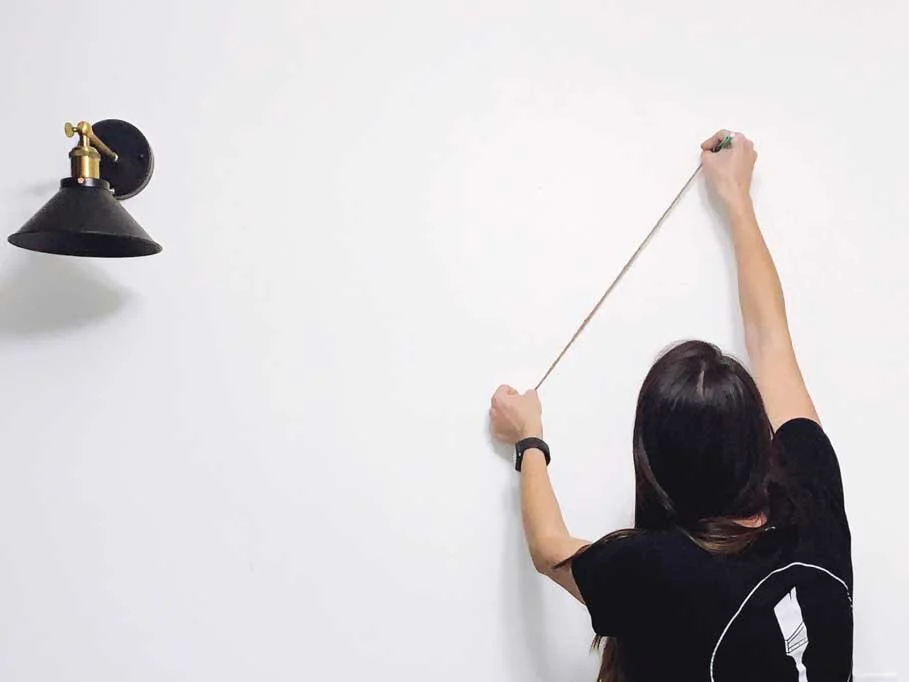
Next, time for the round top! Cut a piece of string that is half the width. Use a piece of twine that is not stretchy because you want it to be exact and not have any give. The example arch is 36 inches wide so we cut the string 18 inches long. Measure where the middle of your arch is. Mark this spot with your pencil. If your arch is not very wide, you can hold the string to the middle of where your arch will be and at the point that it will start to curve in. Some tutorials might suggest securing the string with a small nail or pin, but that will leave a hole in your nice new mural. You can also tape the string to the middle point, but we’ve found that tape isn’t as sturdy as holding it or having someone hold it. Pulling the string taught, draw a half circle from one side of your arch to the other.
Step 3 - Trim Edges
Time to start to paint! Start with your brush to trim the edges. You can use painter’s tape for the sides, but you may have to come back and touch up where the paint bleeds through. If you use a good edging brush (this one is our favorite) and take your time, no tape is necessary.
Step 4 - Roll inside
Once you have the outside trimmed, load up your roller and paint the inside. Apply additional coats as needed and viola! You have a beautiful focal point mural for your room!
Have a question we didn’t answer or looking for more info like this? Follow us @ironbrushmurals on Instagram and Facebook. And, if you do your own painted arch mural, we’d love to see it!
Happy Painting!
- Cara & Cynthia


